My Cosy and Crusty Simple Bread Recipe
The Beauty of Homemade Bread
I love baking bread for my family since homemade bread is very simple, costs less than store bought and the ingredients are fewer. Homemade bread doesn’t include vegetable oil, emulsifiers, preservatives and enriched synthetic vitamins like supermarket bread often includes. I actively aim to minimise this items from my family’s diet.
In the cooler months of the year such as autumn, I find myself baking bread much more. Autumn is a cozy and rustic season. The days are getting cooler, but the temperature is still tolerable. The smell of freshly baked bread wafting through the house as the weather cools is one of life’s beautiful slow living pleasures.
The cooler mornings and evenings invite us to get out the cozy socks and read a good book. If we follow nature’s cues, we naturally want to slow down. One of the best companions for this time of year is a slice of freshly baked bread!
Historically, Autumn is associated with the harvest. It’s the season for harvest. Harvest the grain and then bake with it through the cooler months.
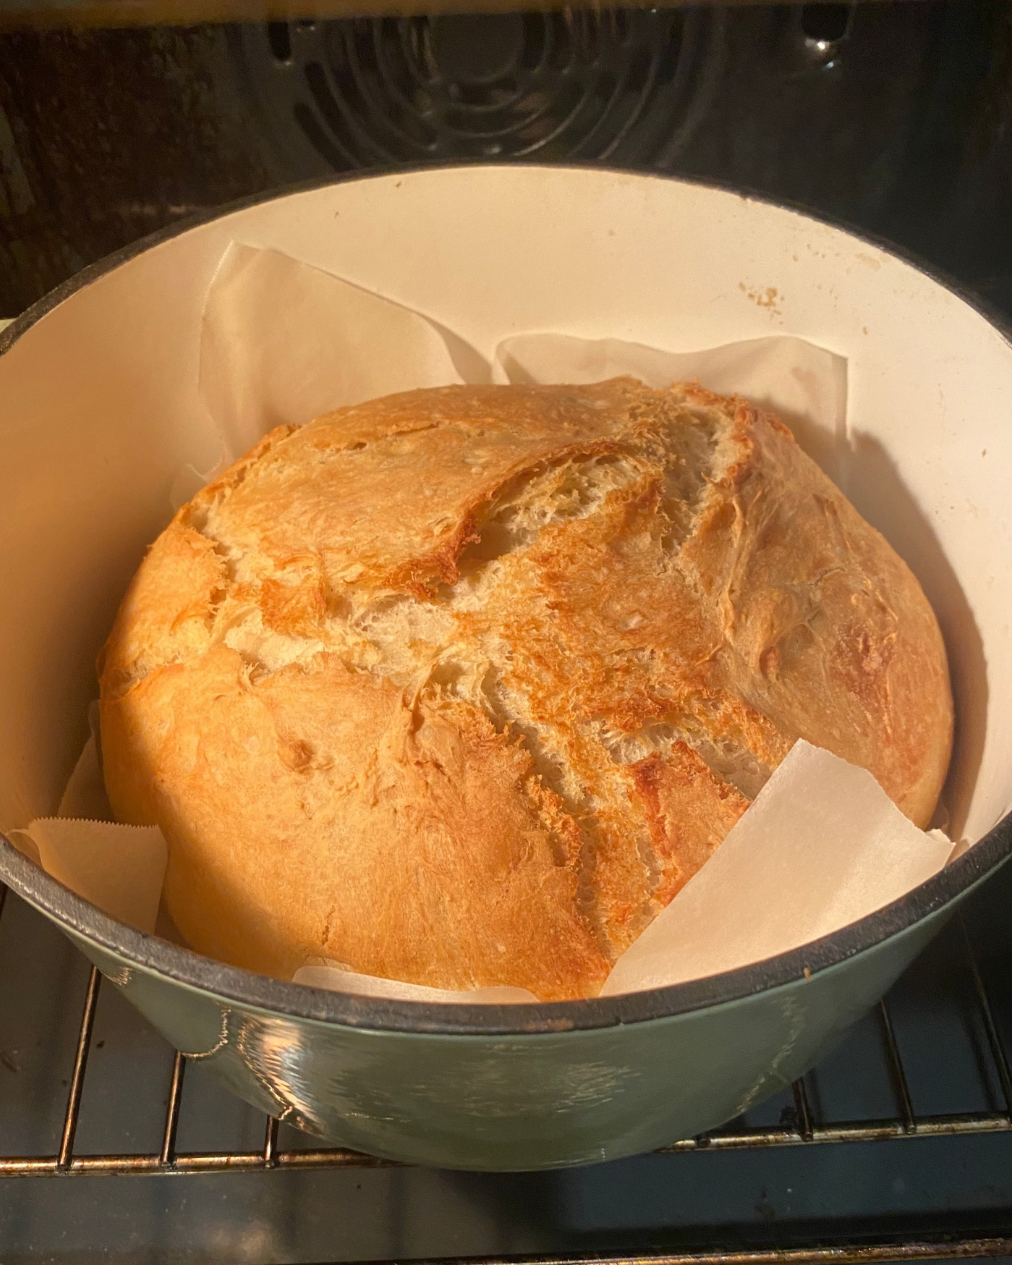
Take the lid off your dutch oven for the final 10 minutes of baking for a crusty top!
About this Simple Bread Recipe
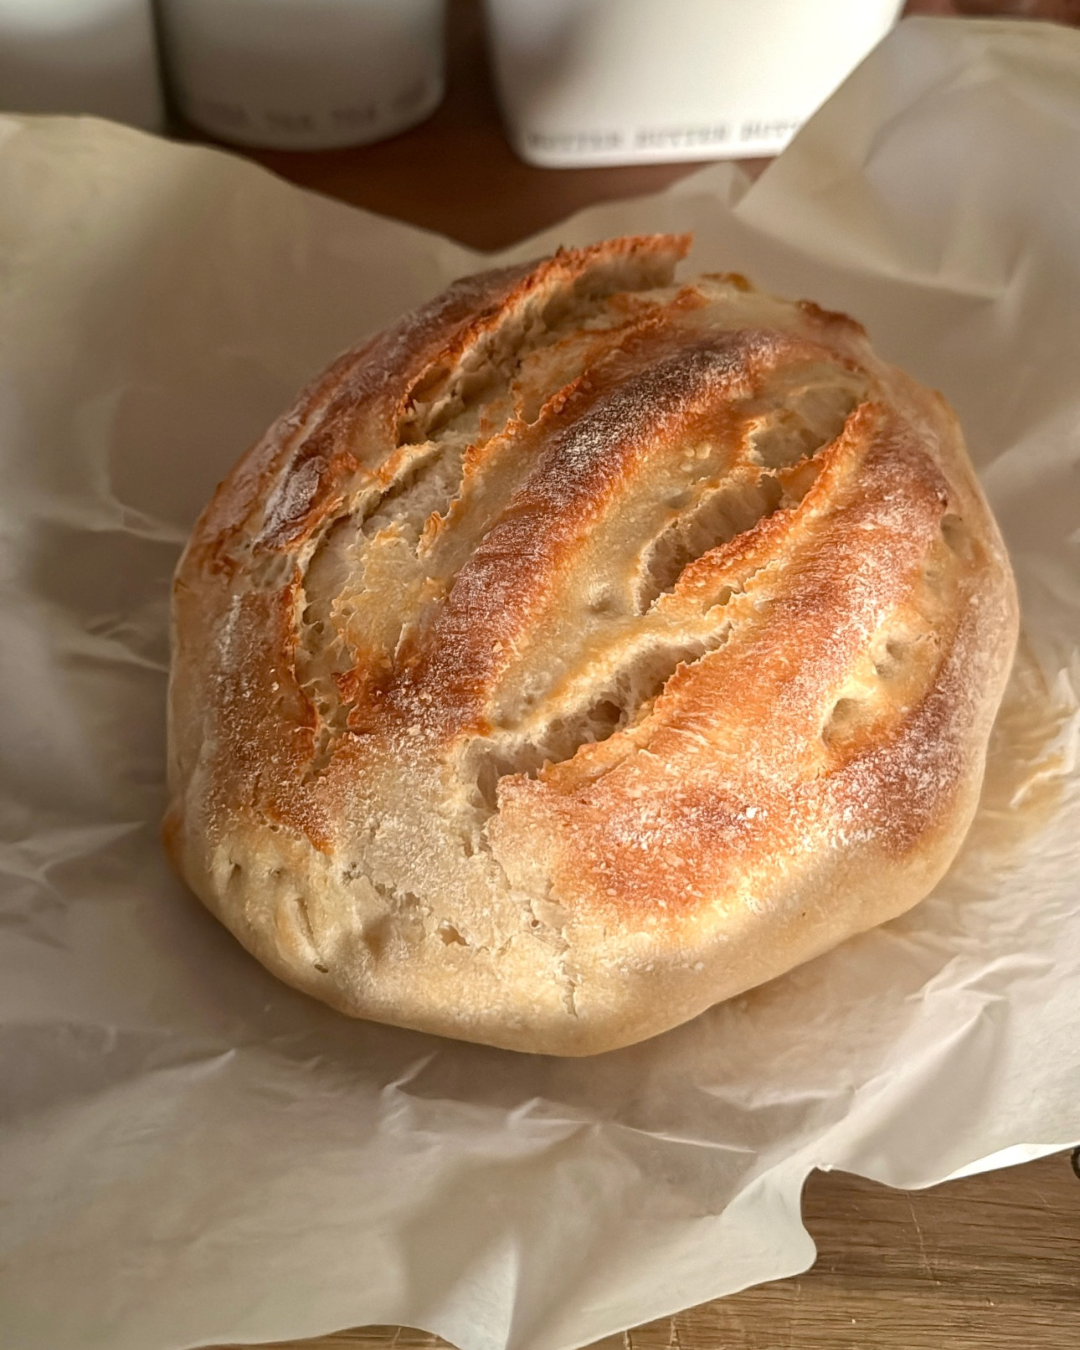
I consider this bread simple because you do not need a dough hook or strong bread shaping skills. If the dough is a little rough on the top when you are putting it into the oven, that is even better as it gives crunchy texture!
You also don’t need sourdough starter, instead you can work with instant baker’s yeast from the supermarket.
I encourage you to make a loaf this weekend. Perhaps even incorporate it into you autumn weekend rhythm.

Crusty Simple Bread Recipe
Ingredients
- 3 cups flour (420g)
- 2 teaspoons of instant baker’s yeast
- 1 teaspoon of cooking salt
- 1 and 1/4 cups of warm water (300ml) + 2 teaspoons if needed once mixing
Instructions
- Measure out ingredients: In a large bowl, mix the flour, yeast and salt. I use this Danish whisk whenever I bake bread.
- Mix dough: Add the water to the dry ingredients. Mix together with a Danish whisk or wooden spoon. If the mixture is very dry, slowly add a teaspoon at a time of water. You don’t want it to get too sticky. For mixing, I like to get my hands in and give a really good mix, but you don’t have to! What you want to do here is strengthen the dough so it rises nicely when in the oven. Mix until the dough forms a big ball in the middle of a mixing bowl.
- Rest dough: Cover the bowl with a damp tea towel and place in a warm place in your kitchen to rest for 2.5 to 3 hours. Once your dough has doubled roughly in size, give your bowl a nudge and if the dough wobbles it is ready to bake!
- Pre-head oven: once your dough has risen, pre-heat your oven to 220°C (428°F). Place your casserole dish (dutch oven) inside your oven to get hot.
- Shape bread: while the oven heats up, rip out a sheet of baking paper onto your bench. This baking paper will be what you drop inside your casserole dish. Tip out your dough onto the baking paper and shape how you like for baking. Either a round or oval shape is ideal. You may like to use a knife to cut a 1 inch deep slit to create crunch texture on top.
- Bake bread: Use gloves to take your casserole dish out of oven and place your bread and baking paper inside. Close the casserole dish lid again and put back in the oven. Bake for 35 minutes with the lid on. Then take the lid off your dish and bake for a further 10 minutes with the lid off to brown the top of the bread.
- Rest: Once cooked, remove from oven and rest. Allow it to cool slightly before cutting. That is the hardest part!
- Enjoy: enjoy your delicious warm bread! I like to serve with butter and honey.
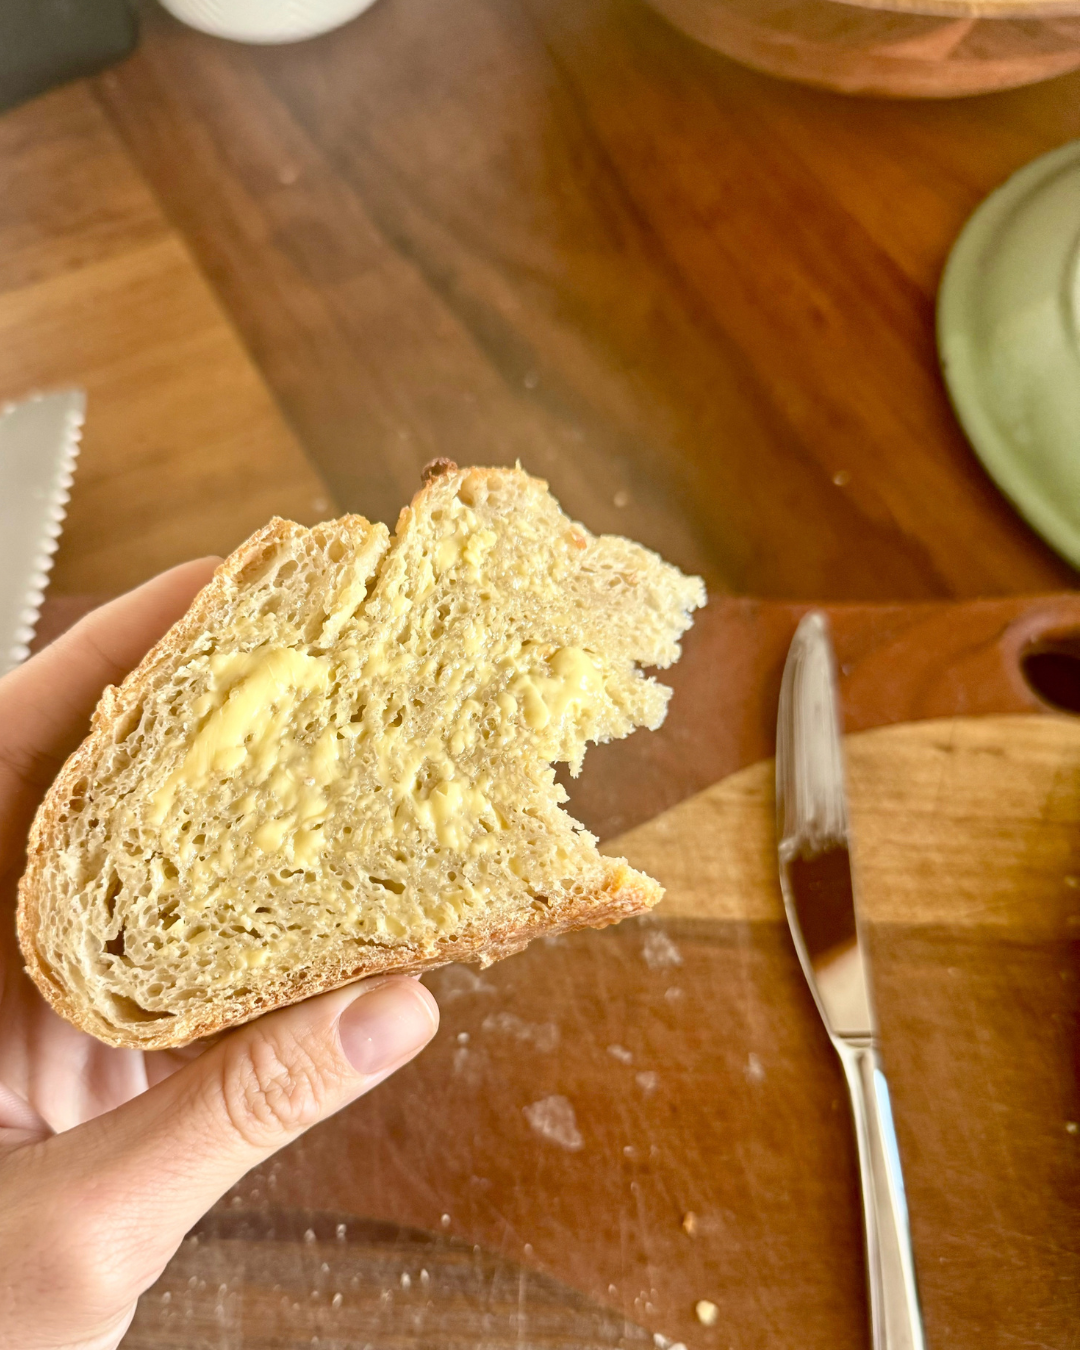
Eating a warm slice with with lots of butter is a must!
Notes
My favourite flour to use is one that is not enriched. Personally, I don’t want synthetic folic acid or thiamin where possible.
If you live somewhere not humid and very dry, you may need a little more water. Conversely, if it’s super humid where you are a little less water. This recipe works for me in NSW, Australia.
If you have kitchen scales, weigh your flour and water for exact measurements.
Pair this bread with a delicious homemade hot apple cider!
In Closing
I hope you make this crunch bread recipe for autumn! Enjoy and lather up with lots of butter and a hot drink.
Please let me know in the comments in you make it. This is my first time ever publishing a recipe I use regularly :)
To keep up the seasonal autumn celebration, stick around and read my post on how to romanticise your life this autumn.
You might also like to snuggle up with a good book this autumn, see my post for cosy books to read in autumn for some ideas!
Rachael x

Hi, I’m Rachael.
Welcome to my cosy cottage! Put on the kettle and stay awhile. See my blog for more cosy posts.
More Posts to Explore


Gather your family for dinner and enjoy this comforting chicken and vegetable pot pie recipe. Features a golden flaky crust and a flavoursome, creamy filling everyone in the family will love! There is something so nostalgic about a homemade pie.